Common recommendation
- Use wired LAN for stability whenever possible
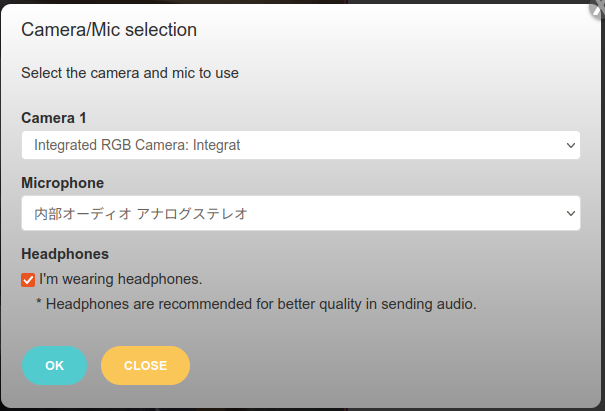
- Use headphones/earphones to send audio in better quality and check it in the camera/mic selection pop-up menu (see the left figure).
- Wired headphones are recommended for zero latency.
- Use a USB mic, USB audio interface, or USB mixer with a “direct monitoring” feature to monitor your voice and what you play.
- Alternative: Wear headphones on one ear only.
- Adjust the audio gain properly at the loudest sound from your instrument.
- The sound of a musical instrument or singing may be much louder than your speech.
- Get closer to the mic or speak up for conversation.
Two cameras Configuration
- Simply add another camera (webcam or any USB camera) to the basic configuration.
- Exception: iPad does not support external USB camera/web cam.
Example 1 (Basic configuration)
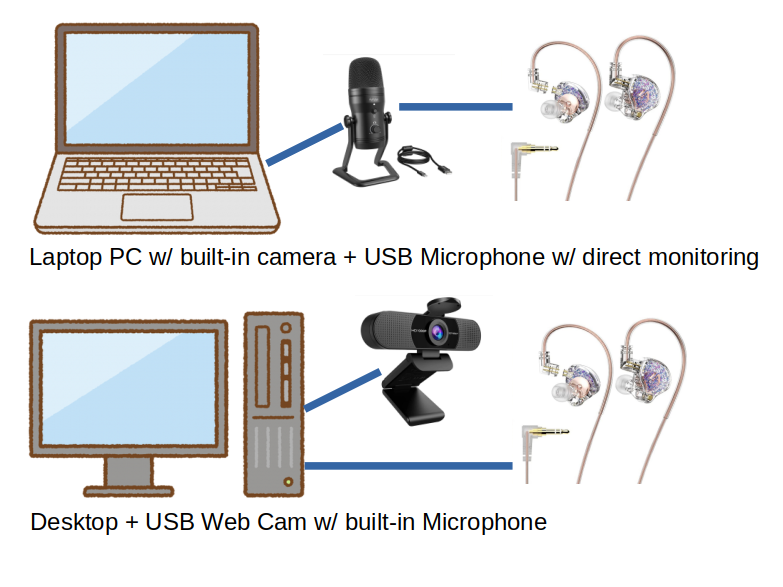
Laptop PCs are equipped with built-in cameras and microphone(s), while most desktop PCs are not. Unfortunately, most laptop PCs’ microphone input is switched to the headset microphone when headphones are connected to the headphone/mic combo jack. In other words, a built-in mic cannot be used with headphones.
Laptop PC (Windows/macOS/Linux)
- USB microphone with input gain adjustment and direct monitoring feature
- Connect your headphones to the mic.
- The built-in mic can be used if the built-in mic works with headphones.
- Windows: Check the audio setting, especially the mic boost. Turn off the mic boost to avoid distortion.
- macOS: check the mic gain setting from the “speaker/headphones” icon at the upper right of the screen. Check whenever you use the mic because the gain setting may not be persistent.
- Direct monitoring is not possible in this case.
Desktop PC (Windows/macOS/Linux)
- A camera is required. Usually, a web cam has simple microphone but the mic gain adjustment is not available.
- Add a USB microphone same as for laptop for better sound and direct monitoring.
Example 2 (Advanced audio configuration)
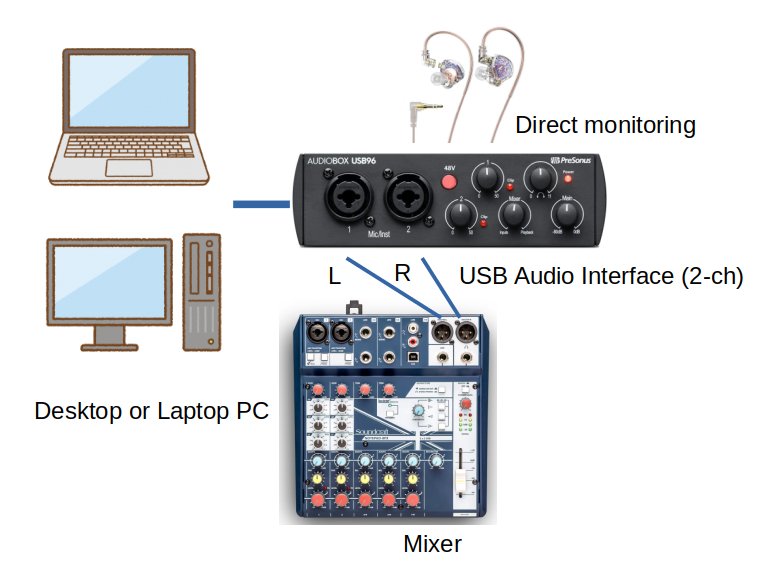
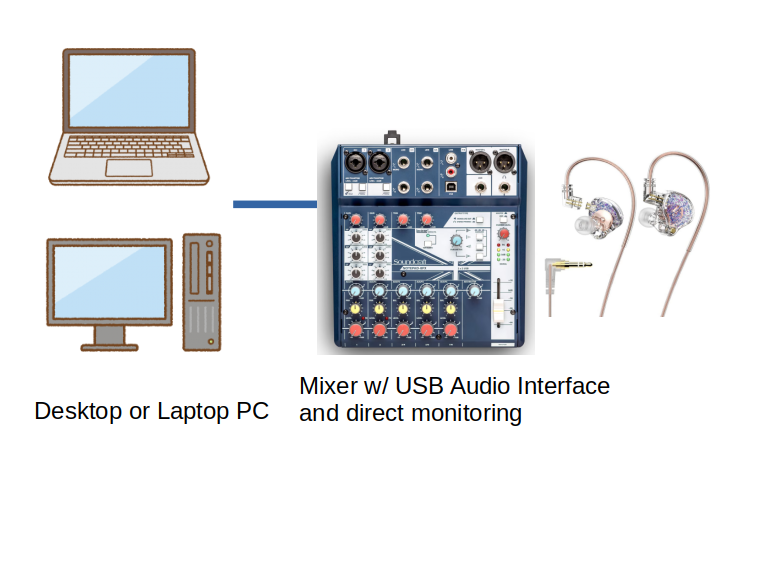
Entry-level USB audio interfaces have 2 channels and our video conference software supports only 2 channels with USB Audio Class 1 or 2 (UAC in short). That is fine If your interface has more than 2 channels. Only the first 2 channels are recognized by the software.
Why a mixer is recommended
If you connect a mic to channel 1 and a keyboard instrument to channel 2, your partner will hear your voice from the left and a keyboard from the right. That is not comfortable for your partner. You can pan your voice to the center and transmit the stereo sound of the keyboard with a stereo mixer.
Another advantage is more than two input channels if a mixer is available. See a typical application below.
Typical Application of Mixer
- Two microphones: for conversation and instrument
- Metronome or backing track playing on a smartphone or audio player
- Stereo keyboard instrument
- 6 input channels in this application
USB Audio Interface + Mixer v.s. USB Mixer
Finding and using a USB mixer is a little bit hard if you are not a computer/audio geek. An example is Soundcraft Notepad 8FX. Although It works fine a setup is required to send the stereo mix to the computer. 12FX does not work as expected on macOS. We recommend using a USB audio interface and mixer (with or without USB) if you are not good at computer/audio.
Choice of Audio Interface
- USB Audio Class 1 or 2 compliant (supported by most of the recent products)
- ASIO drivers for Windows are not used in our app.
- Direct monitoring feature (supported by most of the recent products)
- The volume balance adjustment feature between the monitor and receiving sound is desirable.
- USB cable included for your PC?
- Type-C, Type-A, and other shapes
- You need to buy a cable or adapter if not included.
Choice of Mixer
- Any stereo mixer with or without USB should work
- Choose a product from well-known brands in the field of DAW or home recording
- Think of how many input channels you need: 3, 5, 8, or more.
Choice of USB Mixer
The list below is only a part of the suitable mixers. These two products are tested by the site administrator.
- Soundcraft Notepad 5, 8FX
- 12FX is not recommended but can be used with cable hack.
- Hack: Connect L/R main output to channels 1 and 2, respectively.
- FX stands for effects. Reverb can be added to the stereo mix.
- 12FX is not recommended but can be used with cable hack.
- Behringer Xenyx Q802USB with cable hack for direct monitoring
- Seems to be a discontinued product. You may find a used one at less price.
- Hack: Connect FX output (mono) to L and R of the recording inputs.
Example 3 (iPad)
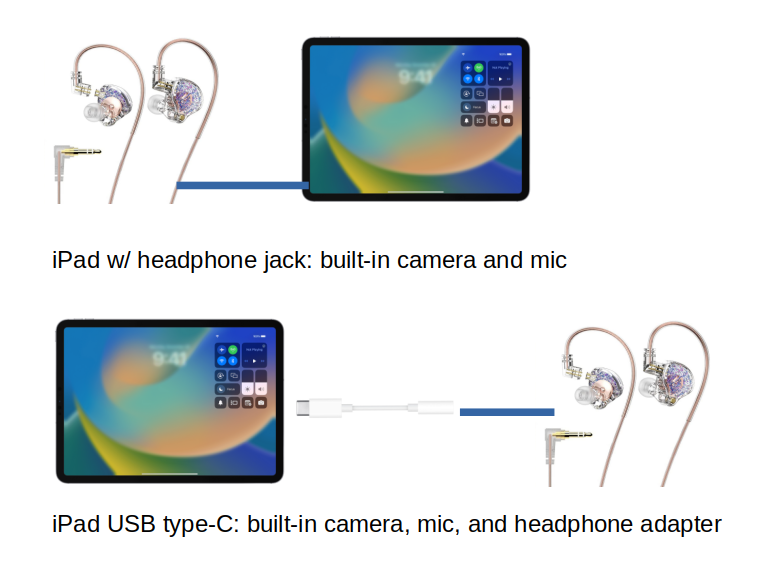
An external USB video camera is not supported on iOS/iPadOS devices. Unfortunately, external audio devices are not supported by our video conferencing software based on web browser functionalities although they are supported by the native app such as Garage Band.
- Just connect the headphones to the headphone jack if your iPad has a hole.
- If your iPad does not have a hole, connect the headphones via a “USB type-C to headphones adapter” (Apple genuine adapter is recommended).
- USB type-C hub with DAC may work but Apple genuine adapter is recommended because it is cheap and guaranteed to work.
Notes on sound quality
Unfortunately, the sound quality is rather poor because the mic input gain cannot be adjusted from our app. We tested the iPads with Lightning and USB Type-C and evaluated the sound quality.
iPad (Lightning, headphone jack)
- The input gain is rather low.
- You must speak up or get closer to the mic for conversation.
- A drum kit sound is distorted but other less loud musical instruments sound OK.
iPad (USB Type-C, no headphone jack)
- Input gain is aimed to conversation (quite high)
- Sound distorts with playing acoustic guitar
- Conclusion: You must be far from the iPad when you play loud musical instruments, such as sax. A drum set is heavily distorted.
Windows Sound Settings
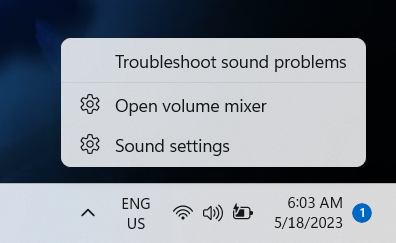
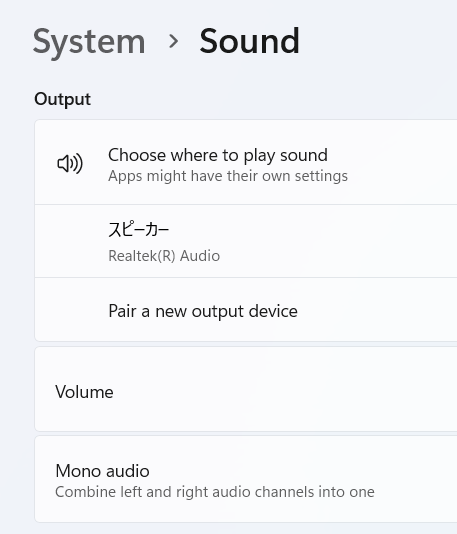
Audio Output Device Selection
You may need to select the audio interface as the sound output device if no sound is heard from the headphones connected to the audio interface.
- Right-click the volume icon,
- Select your audio interface for Output
disable the built-in mic boost and Adjust Gain, Effects
This operation is required only if you use the built-in mic on a Windows laptop PC. You may skip this if you use an external USB mic or audio interface/mixer.
Boost is set as default for a built-in mic on many Windows laptop PC. It is good for speech but the gain is too high for musical instruments. Then first disable the boost and adjust the gain. The operation is similar to the previous output device selection, but you should go deeper into the recording devices properties menu.
- Right-click the volume icon, and choose Recording Devices.
- Click your recording device, and go to properties.
- Change the gain, boost, and disable effects (incl. optimization for speech recognition).
macOS Sound Settings
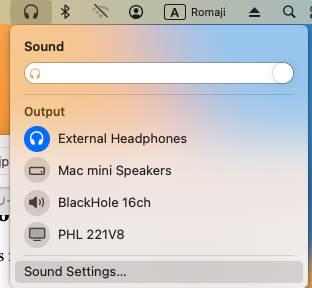
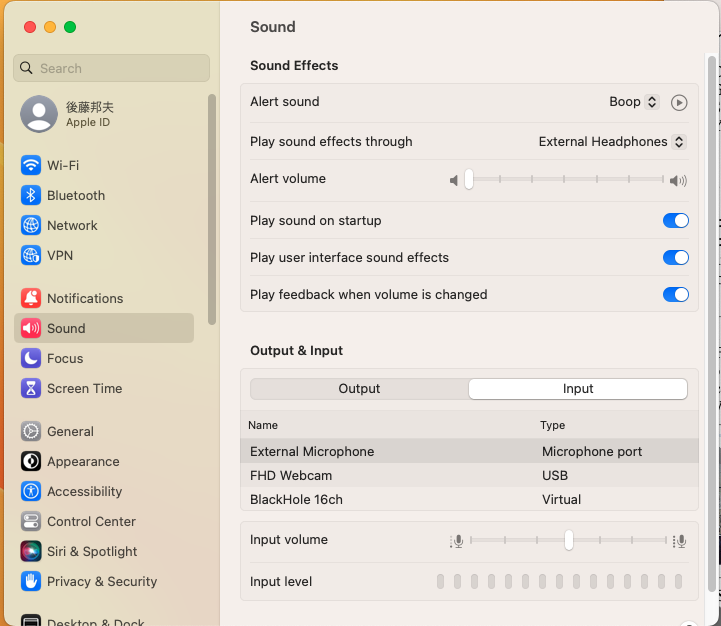
Audio Output Device Selection
You may need to select the audio interface as the sound output device if no sound is heard from the headphones connected to the audio interface.
- Click the volume (speaker/headphones) icon
- Select your audio interface for Output
Adjust Mic Input Gain, Disable noise reduction
This operation is required only if you use the built-in mic on a macOS PC. You may skip this if you use an external USB mic or audio interface/mixer. Note that the input gain (volume) for a USB device is max (1) for normal use. The input gain should be adjusted in the audio interface or USB microphone.
- Sound Settings (see the top figure in this section)
- Select input and the target input device
- Adjust the input volume for the mic
- Disable ambient noise reduction (not to be used for music applications) if there is a checkbox for it. (depending on the model)
The settings may not be persistent. Then you should check it again when you use the mic.
Further Settings
Applications > Utilities > Audio MIDI Setup


Leave a review